Author: John Kendrick
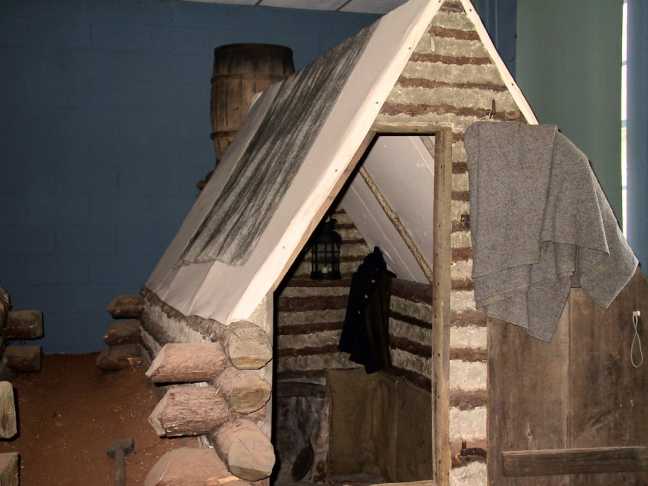
I guess alot of folks wonder what exactly is a Civil War hut. This discription was taken from a diary of a soldier in the 44th New York Infantry. His regimental camp was very close to the camp we dug at Diggin’ in Virginia.
Being, as I said, aware of the long duration of supposed temporary stays in military life, this house of ours (“shanty” was the correct name in camp language) was promptly begun. In our regiment they were not so strenuous for uniformity of architecture as in some commands, and allowed scope for individuality; as long as the line of front doors was pretty straight down the company streets, we could build our shanties of size and style to suit our tastes. Certainly, Eugene and I had about the worst looking one of the settlement. It was, first, a cellar dug the full size of the ground plan, about two feet deep. Next came a wall of split pine logs, resting on the ground and held up by stakes, carrying up the cellar wall to a height of five feet in all. Now, the roof was of canvas, made of several of the little shelter tents, fastened together and stretched over a ridge pole, which was supported by two stout uprights in front and rear. The front, or door, was also of canvas until we got our chimney built , later on. Our next step was to caulk our wall with mud. Glorious Virginia mud! The one product of which there was always enough. Plastic as butter, but tough as spruce gum when dried; for architectural purposes, admirable; for pedestrian uses, vile. We plastered our wall pretty tightly with this natural stucco, and banked up the lower edge. We ditched around our house, and conducted the waters into the company gutter. Our bed, which comprised all our furniture, being also chair, sofa and table, was our next care. It was a spring bed. We split long, straight pine saplings and laid them crosswise of the shanty on supports which held them about level with the surface of the ground. The bed was about three feet wide, Eugene and I were both slender. When sitting on the edge of the bed our feet rested against the front wall of our mansion. Here we talked; here we smoked; here we read; in pleasant weather, with our front canvas fastened back. We conversed with our neighbors, discussing every subject under heaven, and here we sat, Eugene and I. By our own fireside after the chimney was built.
Our chimney was a picturesque structure of sods. The mortar which held together these substitutes for brick was the aforesaid mud. An open fireplace faced the right hand manof the two inmates who sat on the bed, and that man did the cooking from that position. Our chimney was a large one, covering more than half the front of the house and forming our front wall. Vice canvas removed. A wooden mantel defined the top of the fireplace. Above this the chimney tapered somewhat and ended in a barrel. Some of our comrades had double-barreled chimneys, but we found it hard enough to steal one barrel at a time to supply those which caught fire; total loss; no insurance.
LOCATIN” HUTS
Most folks first question is how do you know when you have found a hut. There are several ways to locate huts.
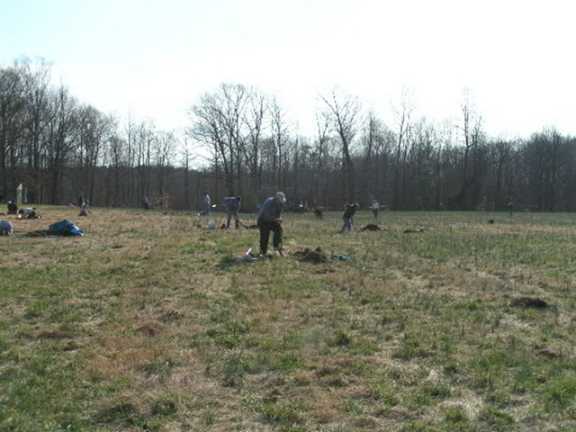
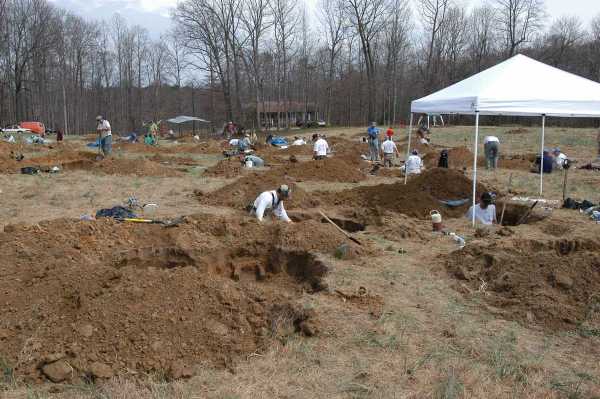
Notice in the first picture taken very early the first day at the DIV hunt in March. There is absolutely no visible evidence of huts except the few test holes that some of the guys have dug. Now look at the second picture taken from roughly the same area a day later.
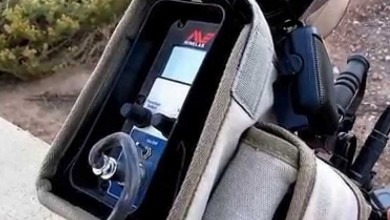
The best way to locate the huts is to use a good metal detector in ALL METAL mode. Listen for DEEP iron signals. The deep signals come from the iron barrel bands we mentioned earlier along with other junk and goodies buried on the bottom of the huts. The poor farmer kicked the chimneys into the hut holes when he started reclaiming his fields after the Army left.
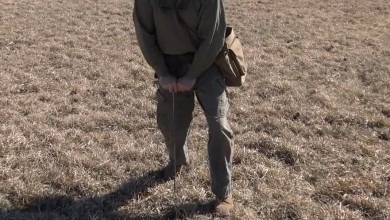
The next best way is to use a good SPRING STEEL PROBE long enough to reach the floor of the huts. Believe it or not, the “floor” of these huts are often very hard packed dirt. You can very easily feel it with a probe. Even when the floor isn’t so hard you can still find the firebox which is almost always very hard baked earth and is sometimes lined with brick or stone.
The third method for locating huts is by simply diggin’ TEST HOLES. This is even more back breaking than probing, but after some huts have been dug and you can figure out the “lay” of the camp, you can pace off the distance between known huts and dig test holes.
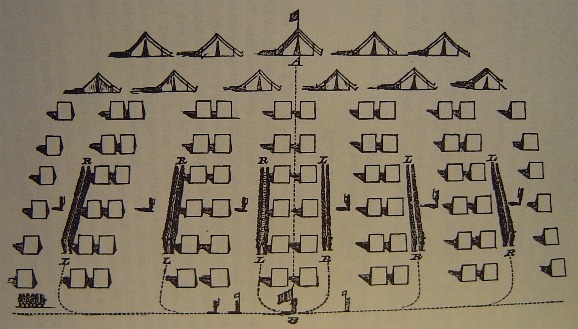
This old illustration shows the layout of a typical regimental camp during the Civil War. This layout wasn’t followed to the letter but most camps are close to this. In particular, notice the back to back rows of huts and the company streets between the rows. All camps are not laid out with back to back huts, but most are. The officers quarters shown at the top can be anywhere.
DIGGIN’ HUTS
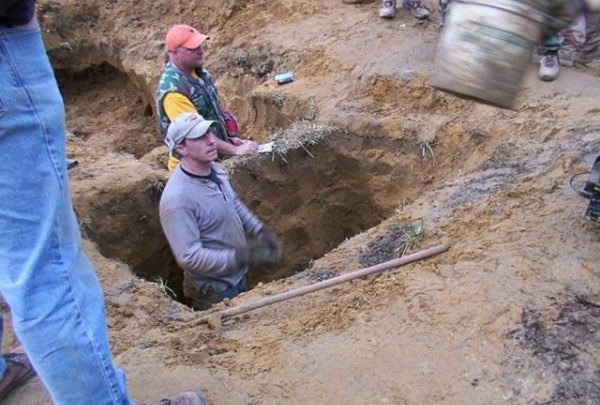
Now the real work starts! OK, you have found what you believe to be a hut by whatever method. You dig your test hole….I like to dig a hole big enough so I can see the dirt patterns and color. Usually a hole 18″ across and 18″ deep is large enough.
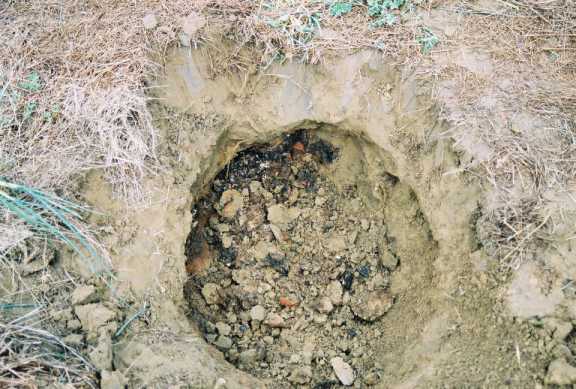
This is a good one! I get pretty excited when I see all that COLOR in the bottom of a test hole! I can see ash, charcoal, small pieces of iron, and burnt earth.
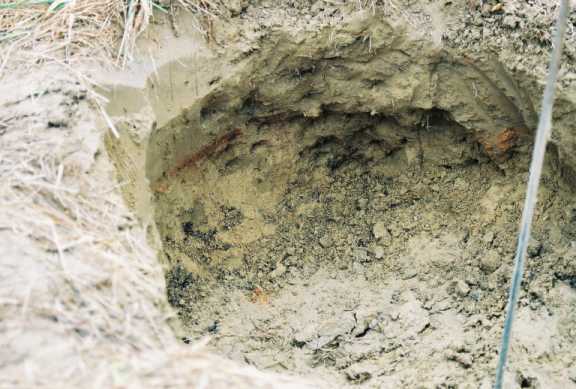
You won’t always be able to see soo much COLOR in your test hole. Sometimes you will only be able to see very small pieces of charcoal or maybe broken glass. You have to remember that fields have been plowed for 140 years since those huts were abandoned. The plow usually goes down 12″ to 14″. After you become accustomed to the different dirt colors and patterns, you will easily be able to see the PLOW ZONE. More on that later. The main thing is that you look very carefully around the sides and bottom of your test hole.
Here’s a hut Doug King and I dug last winter. Theres a bunch of stuff going on in this picture and I have tried to mark some of it in the second picture below.
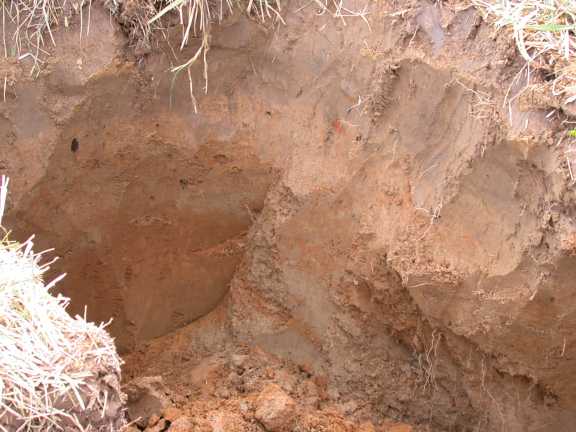
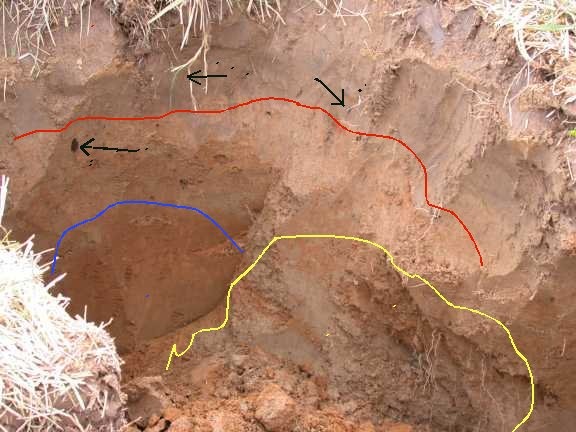
The red line is following the bottom of the PLOW ZONE. The yellow line defines the USE LAYER. Notice how the dirt is basically the same color as the dirt in the plow zone. It is mixed and MOTTLED but much different than the dirt enclosed by the blue line which is a uniform orange color. The blue line defines a WALL. The uniform orange color dirt is undisturbed subsoil.
OK, so what you need to do is dig down till you hit a hard packed FLOOR….branch out following the USE LAYER till you hit the orange subsoil which is a WALL. Follow the wall till you find a corner and follow that wall. Find all 4 corners and your hut is just about complete. Make sure to remove all the dirt from your hut. The relics and bottles can be anywhere in the hut…on the floor usually, but can also be above the floor in the use layer. Be careful, and above all, take your time. Check the sides of your hole often with your detector and small coil….check your dirt pile often….there were lots of relics left in the dirt at DIV I.
TOOLS FOR DIGGIN’
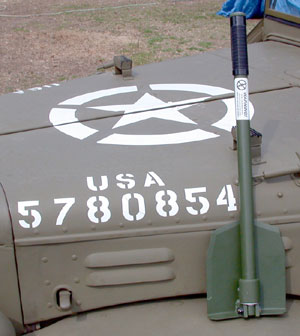
Of course don’t forget your detector with a large coil for hearing the deep iron and a small coil for picking through the junk after you get into your hut. You will also need a plain old #2 shovel. I use the rounded shovel which is sharpened on a grinding wheel. You may want to get a SPRING STEEL PROBE. It sure comes in handy for those huts that don’t have enough deep iron to hear with your detector.

This little Model 85 Predator tool is indespensible for working down in the hut….don’t leave home without it!

George Lesche gave me a Predator Tool model 31 Raptor at DIV I and I have fallen in love with it…this thing is a hoss.
You may need a small short handled shovel for working down in your hut and this Model 45 Predator tool is indestructable.
This wasn’t meant to be a Predator Tool ad….I posted the pictures of these tools for the simple reason that they work and are what I personally use. You won’t find a better tool made by a gentleman who backs up his tools that are all made in AMERICA!!
FINAL DIGGIN’ THOUGHTS
The main thing to remember is TAKE YOUR TIME! These bottles and relics have been here for 142 years so do your best to recover them intact. Make sure that you dig your hut all the way from corner to corner and all the way to the floor. I don’t know how many times a pile of bottles were hiding in that last corner. At every DIV hut there will be people roaming around who have the experience to answer most any question you can come up with so don’t fret and don’t stress. We want you to have a ball, this really is the experience of a lifetime so HAVE FUN!
Acknowledgements:
Thanks to Kevin Colovos and Rick Martin for some of the photos.
Thanks to Greg Sites for the old camp layout photo.
Thank you on all this great information on hut digging.,never dug a hut. Maybe have a chance one day when I get on a hunt with you all. My first will hopefully be the DIV 50 . Thanks again for all your hard work in getting these hunts together.,
You sure do put a whole lot of effort into sharing decades of experience with the future generation to get us in expert mode right out of the gate. if I could use an emoji here it would be one clapping hands. thanks for what all of you do at DIV LLC .Its what sets you apart from any one else.
Thanks guys for the kind remarks. I get great pleasure seeing folks being successful at DIV.
I built this website 15 years ago. It was my first attempt at using HTML. Back then you had to enter every character and it took me a couple days to muddle my way through it. Since then the little site has had many thousands of hits and is still going even as ancient and outdated as it is. It still applies and that is why we added it here.